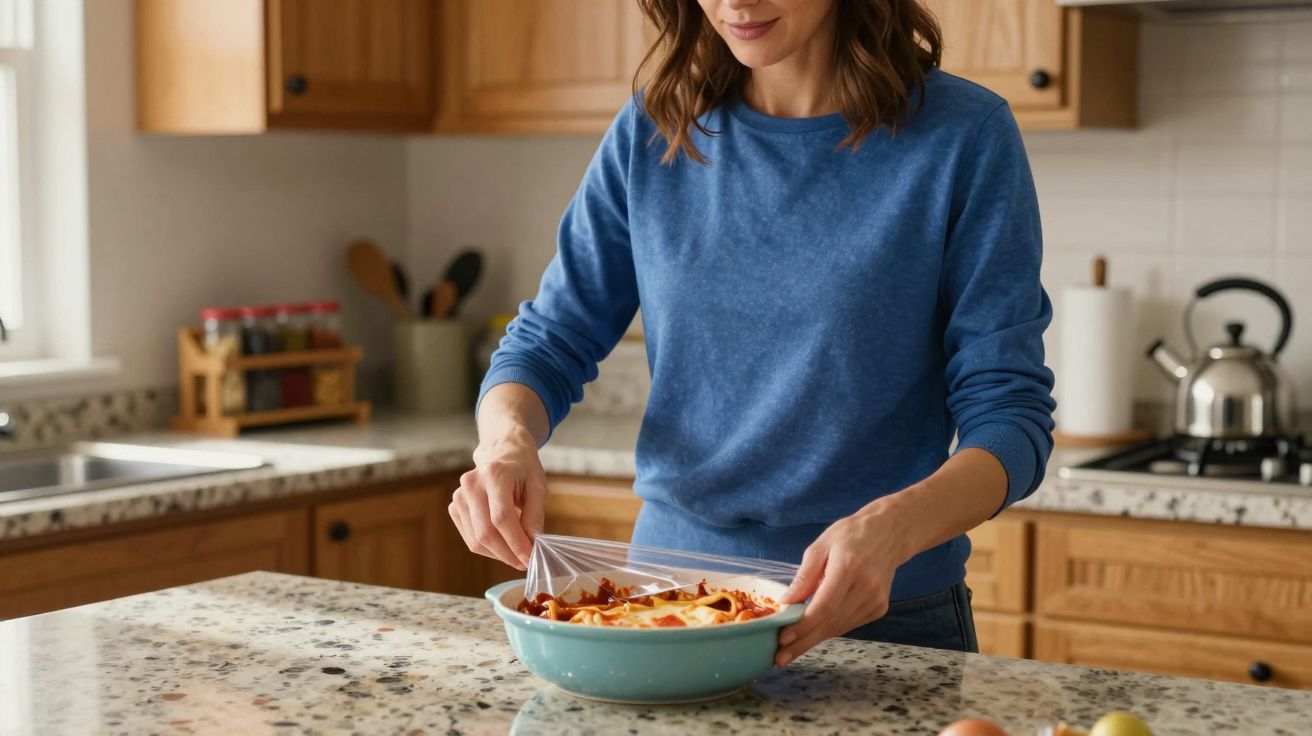
The lid snapped open with that faint icy crack, and Anna’s heart sank before the steam even hit her face.
Last month’s “emergency lasagne” was still there, name and date written in good faith on the lid. But the corners were rimmed with snow, the cheese was crusted in weird white shards, and the top layer looked more like flaky pastry than pasta. Technically safe, technically edible, but the taste of freezer and dry cardboard meant everyone quietly reached for toast instead.
It feels like a personal betrayal. You did the sensible thing. You saved leftovers. You used containers. And somehow your freezer still turns dinner into a time capsule.
The good news: there’s one tiny extra step, right before you freeze, that makes a ridiculous difference to how your food tastes months later.
Why your freezer is doing this to you
Freezer burn isn’t your food “going off” in the usual way. It’s dehydration and oxidation in slow motion. Cold, dry air pulls water out of the surface of your food; that water turns into those frosty crystals, and the exposed bits dry out and oxidise. The result is that tell-tale grey, tough, slightly dusty-tasting layer.
It happens most where air can reach easily: the top of a tub that isn’t quite full, the corner of a bag that didn’t seal flat, that little air bubble trapped under the lid of your soup. The colder your freezer, the safer the food-but also the drier the air, and the more viciously it steals moisture from any exposed patch.
Most of us do the basics: we use boxes, sometimes even decent ones, we scribble a date on, and we think we’re done. But those gaps between food and lid, those loose corners of cling film, are exactly where freezer burn sneaks in.
The fix isn’t a fancy gadget or a new container system. It’s much simpler.
The one extra step: give your leftovers a “second skin”
Here’s the move that changes everything:
Before you put the lid on or seal the bag, press a piece of cling film, baking paper, or reusable wax wrap directly onto the surface of the food, so it touches it all over like a second skin. Then close the container as normal.
That’s it. One extra layer, in contact with the food itself, pushing out the little air pockets that usually sit at the top.
By laying something directly on the surface, you:
- Block dry freezer air from touching the food.
- Stop water evaporating out and forming ice crystals on the lid.
- Reduce discolouration and that “freezer” flavour spreading through sauces and fats.
It feels almost too simple, but it works for the same reason vacuum sealers work: less air, less damage. You’re just doing the no-tech, 20-second version.
“Think of it as wrapping your leftovers in a duvet before you shut them in the cold,” as one food scientist likes to put it. “You’re slowing down the drying, not just freezing it in place.”
How to do it in under a minute
You don’t need to reinvent your whole routine. You just bolt this on at the end.
Cool the food safely first.
Portion into shallow tubs and let it cool at room temperature for up to 90 minutes, then finish cooling in the fridge if needed. Warm food straight into the freezer creates steam and ice-exactly what you don’t want.Choose your “second skin”.
- Cling film for most wet foods.
- Baking paper or foil for something oily or cheesy.
- A reusable wax wrap or silicone sheet if you’re avoiding disposables.
- Cling film for most wet foods.
Press out the air.
Lay the sheet over the top, then gently press it down so it makes contact with the entire surface-right into the corners. No pockets, no domes, just a soft, even layer.Seal as usual.
Pop the rigid lid on, or seal the freezer bag, squeezing out any extra air as you go. Label and date, then freeze.
The extra step takes less time than writing the label, but you’ll really taste the difference the first time you reheat something that’s been there for two or three months.
What to use for different foods
Different textures like slightly different “second skins”. You don’t have to get obsessive, but matching them a bit makes the job easier.
| Food type | Best “second skin” | Why it works |
|---|---|---|
| Sauces & stews | Cling film or silicone | Follows the surface, blocks air well |
| Lasagne & bakes | Baking paper or foil | Handles oil and cheese, peels off clean |
| Bread & cakes | Cling film, then bag | Limits drying and crumbly edges |
If you’re freezing something very soft like mashed potato or hummus, you can also smooth the top with a spoon before adding the second skin. The flatter the surface, the fewer little caves of air to worry about.
For awkward shapes (like half an avocado or a hunk of cheese), wrap them snugly in cling film or wax wrap first, pressing it right into any dips, then pop into a bag or box. Two layers, same idea.
Little habits that make frozen food taste like new
The “second skin” is the hero move, but a few small sidekicks make it even more effective.
- Fill, don’t float. Aim to fill containers so there’s minimal headspace, leaving just enough for liquid to expand as it freezes. Less empty space means less air to cause trouble.
- Freeze fast, then forget about it. Place new tubs near the coldest part (usually the back), not in the door. Once solid, you can shuffle them, but don’t keep moving them in and out-that’s how ice crystals grow.
- Flat-freeze in bags. For things like cooked mince, curries or chopped fruit, freeze in thin, flat layers in bags, laid on a tray. They freeze faster, stack neatly, and reheat more evenly.
- Rotate like a tiny supermarket. New stuff goes to the back or bottom, older tubs get nudged to the front. If you can see what you’ve got, you’re more likely to use it while it still tastes great.
Let’s be honest: nobody arranges their freezer like a magazine shoot every week. But two or three of these habits, plus that second-skin step, can turn your freezer from graveyard to pantry.
How long can things really taste good?
Food safety guidelines often say “up to X months” in the freezer, but that’s about safe to eat, not lovely to eat. With the second-skin trick and decent packing, you push the “tastes good” window closer to the “technically fine” window.
Rough guide, if you’ve done the extra step:
- Cooked stews, curries, chilli: 3–4 months with barely any flavour loss.
- Pasta bakes and lasagne: 2–3 months before texture starts to suffer.
- Bread, wraps and rolls: 2–3 months without that dry, freezer smell.
- Cooked chicken pieces: 2–3 months juicy, longer for soups and pies.
- Cakes and brownies: 2–3 months, especially if well wrapped.
After that, they’re usually still safe if kept frozen solid, but you may notice more dryness and off flavours. Your nose and taste buds will tell you the truth faster than any printed chart.
A new way to think about your freezer
A lot of us treat the freezer like a pause button: shove it in, forget it exists, hope for the best. But the freezer is more like a very slow drying cupboard with benefits. If you respect that, your food will respect you back.
The one extra step-giving your leftovers a second skin-doesn’t require more space, special containers or a weekend of reorganising. It just asks for a moment of attention before you close the lid. A tiny bit of care now buys you a proper dinner later, not just an obligation you microwave because you feel guilty.
Next time you’re ladling soup into tubs or wrapping up half a traybake, pause before you snap the lid shut. Lay on that extra layer, smooth it down, and seal the air out on purpose.
Future-you, standing in front of the open freezer on a cold Tuesday night, will taste the difference.
Point clé
| Key point | Detail | Why it matters for you |
|---|---|---|
| Freezer burn = dry + oxidised | Caused by cold, dry air touching the food | Explains why lids alone don’t always work |
| “Second skin” step | Press film/paper directly onto the surface | Slashes air exposure and keeps texture |
| Simple storage habits | Cool fast, pack tight, label, rotate | Turns frozen leftovers back into easy meals |
FAQ:
- Is freezer-burnt food unsafe to eat?
Usually it’s still safe if it’s been kept frozen solid, but the texture and flavour will be poor. You can trim badly burnt areas off cooked meats or scrape the top layer from stews, but prevention is much nicer than surgery.- Can I fix freezer burn once it’s happened?
You can’t reverse the drying, but you can hide it. Use affected food in soups, blended sauces or heavily sauced dishes where extra liquid and seasoning can compensate a bit.- Does this “second skin” trick work with raw meat and fish?
Yes. Pat them dry, wrap tightly in cling film or wax wrap (pressing to remove air), then put into a bag or box. Label clearly and keep raw items on the bottom shelf of the freezer to avoid drips when you defrost.- Are vacuum sealers better than this?
Vacuum sealers are brilliant if you use your freezer heavily, but they’re not essential. The second-skin step gives you much of the same benefit for everyday leftovers with what you already have.- Do I still need to label everything?
Absolutely. The best-frozen meal in the world won’t help if you don’t know what it is or how old it is. A quick note with the name and date turns that mystery tub into an actual plan.


Comments (0)
No comments yet. Be the first to comment!
Leave a Comment